Monday, September 30, 2013

Making Christmas Decorations - Day 4 of the 12 Days of Christmas.


Christmas Crafts - Homemade.
Each Year I set myself the unreachable task of making all my Christmas Gifts. I have yet to reach my target. Each and every year I end up trying to do so much last minute even though I start making them back in September.
I use all types of mediums - crochet, paper crafting, ceramics, polymer clay and much more.
Here are a few crochet ones that I have made.

With these ones I used curtain rings and crocheted around them.
With these ones I used crochet and 3D Decoupage. I love this one.
These are ceramic moulds that I made and painted.
Fine crochet bells. These were beautiful.
Fine crochet star.
I got this wool years ago in Canada and I just wish I got loads more. It was just beautiful.
This one is made with paper and medallion stamps. Each piece is coloured in by hand.
Crochet ring with 3D Decoupage.
Crochet wreath.
Crochet Christmas Cake.


Crochet Pear and Apple.

All the above I have made over the last few years. I have lots more to show you but it's just a little snap shot of what you can do. For many of my relations I give them a little decoration each year. Aunts and Uncles, teachers, people that you want to give a little token to.

Take a look and see would it give you any ideas.

Some of the smaller ones can be attached to the front of a card and it becomes a gift and a card in one.

Go on have a go....


Wednesday, September 11, 2013

12 Days of Christmas - Day 3 - Use up your old Christmas Cards.

Well I feel like I have invented the wheel with this one. I probably haven't. If I was brave enough there are probably hundreds of them on Pinterest but ignorance is bliss at the moment. I know there are many versions of this out there in craft cyber land but please leave me in a state of euphoria for just a little while.

Anyway back to the issue on hand. Old Christmas Cards. Do you keep your old Christmas Cards or do you throw them away? Not everyone can keep their cards or want to and that's fine. I find myself a bit sentimental or just a pure hoarder, I don't know which.

I always keep my Christmas Cards but I'm afraid it was getting out of hand and I had just far too many of them. My Little memory chest was no longer little and had become a bit of a joke to be honest. I looked like I had a problem but of course I couldn't throw them away.

The next question was - "What will I do with them?"

They were placed in a cardboard box in my craft room and to be honest were tossed from post to pillar for another 6 months and I only thought about them when I hoovered around them. Then one night it came to me. What if I cut Holly shapes out of them and made a wreath.

I realise you will see many paper wreaths out there with Holly paper shapes but hopefully there are none like this one.

You could cut them out by hand and if you are doing so make sure you use a template first. Find a holly shape on the net and trace it onto a piece of cardboard. This now will be your template and make it so much easier to cut all the holly the same size. I think

It looks so much better if the holly is all uniform.

I used my Sizzix machine to cut mine out and I had a Die Cut in the shape of Holly Leaves but I do realise that many of you don't have these but as I said you can do it by hand. It may take a little longer but it's something you could do in front of the TV over a few nights.

Next I got a metal round wreath surround which we stock here at Ennis Creative Arts Centre. The Holly shapes are then just placed into the metal. They slide into the ring and don't need to be glued or anything. This wreath costs €15 and the great thing about it is you could take the paper shapes out of it after Christmas if you like and use it for something else, like an Easter wreath or Halloween Wreath.

Next I used a few ribbons to finish if off and that's it really.

I really like it..


I would LOVE to see any ideas you have for using up old Christmas Cards?

Tuesday, September 10, 2013

What is a Zen Tangle or Zen Doodle?


A Zen Tangle or Zen Doodle as it has been called have been described as "Doodles for the brain", "Massage for the Brain", "Yoga for the soul" and so much more.

Remember years ago when you were in school, staring out the window, doodling on the back page of your Irish Copy? Oh Whist a minute maybe that was only me!

Anyway I remember it well. I would be in a far away place dreaming of god knows what and doodling away to my hearts content. No wonder I was put back into pass Irish.

Well that's what it is like only now I am 20 years older and some may think gone way beyond doodling but if you try it you will see it still is such fun.

And most of all it's relaxing. You get lost in your thoughts and doodle away about nothing particular.You're creative side can come out later when you have the piece finished and then you can decide what to do with it.


Young and old just LOVE to do this so why not get some white card and some fine black ink pens and away you go. Doodle til your hearts content.

Here are some things that I have created using the doodle form.


Let me know how you get on. For inspiration take a look at shapes and use templates if you have to for your outer shape.

So off you go. All you need is some white card and a black ink pen...

Off to Doodle heaven...

Love and Laughs.

Monday, September 9, 2013

Cards to sell at Christmas?

Well it's been something that I have been asked on many an occasion. Can I make and sell cards and make money.

The short answer is yes - why not.


Card making is a lovely past time for young and old and I have been making cards for years. The problem with me is I spend hours creating one card and never make the same card twice. You will never make a living from making cards like that.

What you need to do is for example - when Christmas is coming up you need to design about 5 - 10 cards top. And keep making these. These then are you samples and cards for the Season.

I have seen people make great money.


My advice to you is - make your samples. Have about 3 price ranges. Make sure you are making money and price all the papers, stamps etc and include everything. Record all the money you spend in a little notebook.

For me it's not something that I do as a business per say. I enjoy it and if I sell a few cards then all the better.


Why not make your samples and go to your family and friends and show them your cards and try and get some orders. I have some of the ladies that come to the classes here that have gone to their neighbours and got just really great orders.

You would be surprised at how many people will buy.


Many people buy the box set of cards these days and in fairness who could blame them. They are very affordable but many people out there want some extra cards. Perhaps for someone special so why not buy them from you.


Keep a look at the posts that come up and if you are in our area come along to some of the classes and you will learn all types of card making techniques.

Next class starts this Thursday night and we are starting off with Christmas Cards.


Friday, September 6, 2013

12 Days of Christmas - Day 2 - Christmas Cards.

I just LOVE to make cards. Actually I LOVE all paper crafting. I have so many papers. Some girls like shoes. I like papers. Well actually I like shoes too....

In my last post we did a simple wrapping paper and here we are going to do a Card.
Firstly you will need to print out the letters you want to print. They will need to be big enough for the size of your card. Keep enlarging them until they are the correct size.


Here I did NOEL but you could do XMAS, MERRY or any other small word about Christmas. SNOW is another good one.

Once I had them printed out I then traced them onto Card and these will then be your templates and you can use them over and over again.
Once you have your Card Templates you then pick the card or the paper that you are going to use for the letters. Here I have used 4 different papers but you could use just 2 different types. I wouldn't suggest them being all the same as they won't stand out enough.

Turn your paper upside down and also turn your letter backwards. Trace out the letters using a pencil.
Then cut them all out using a scalpel. You can use a small sharp scissors but it's harder to get a straight line.
Here are all the letters cut out.
You could always use the negatives of the leftover paper for another card.
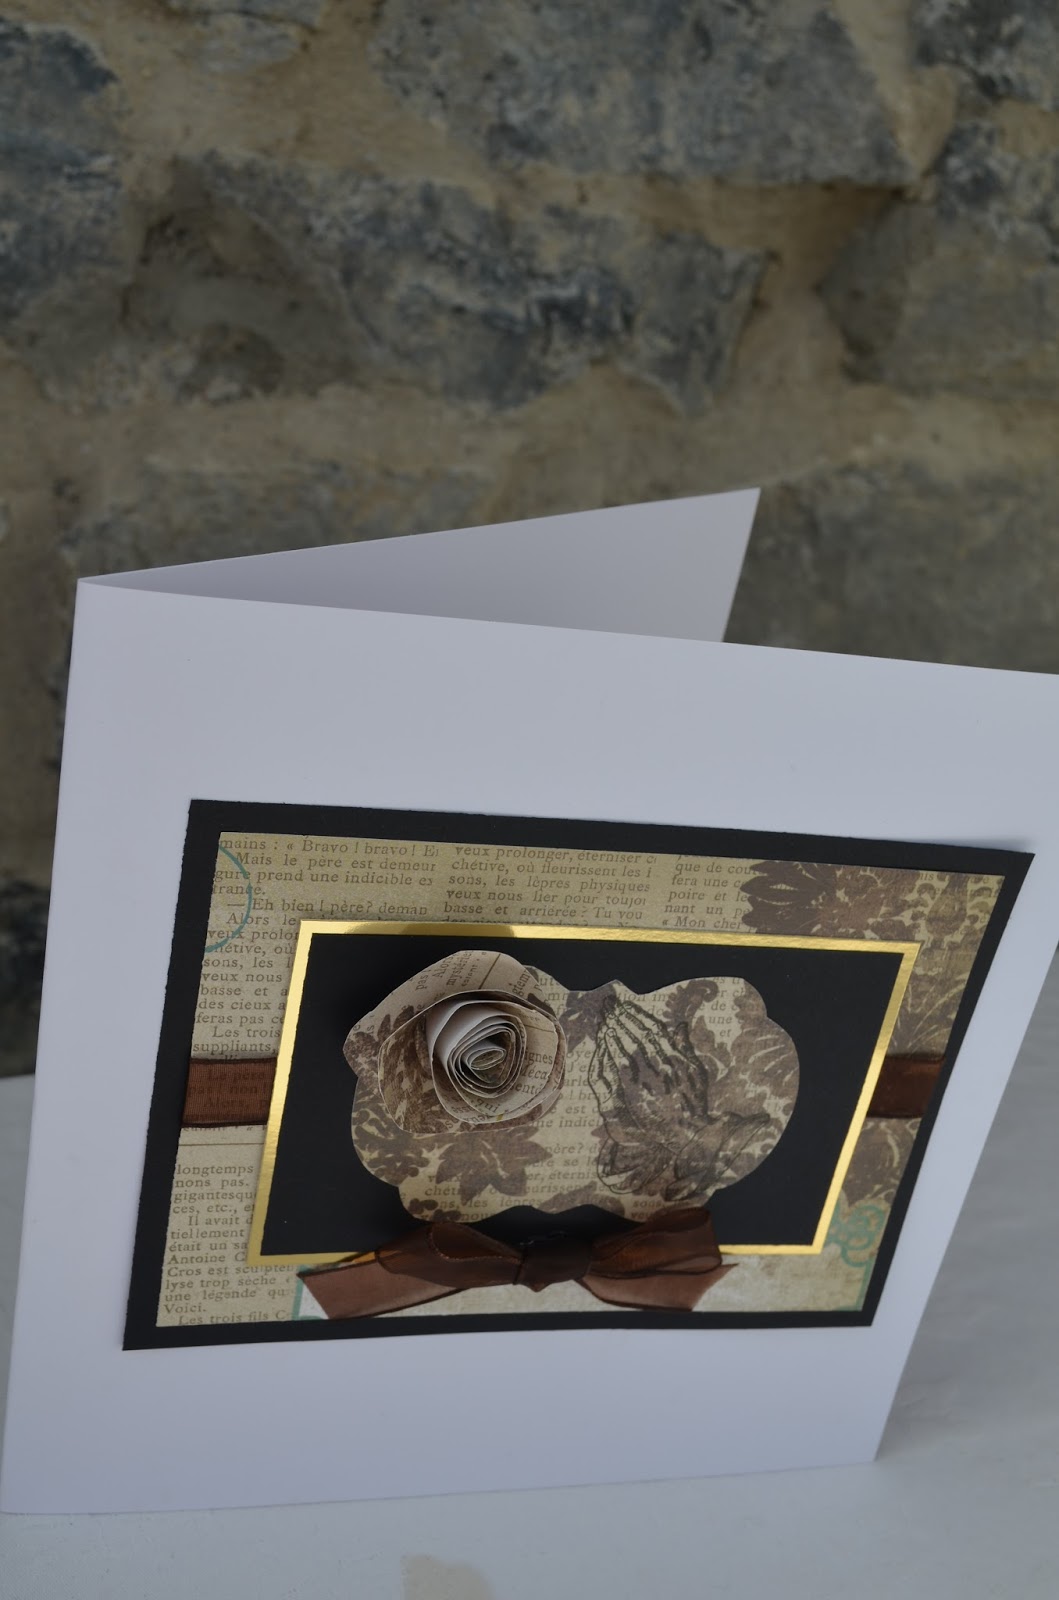
Now try to pick out your backing paper. Here I have chosen a contrast in brown. Then I have placed a gold mirror board behind it to layer it up.
Attach the brown paper to the mirror board with double sided tape.
You will have a small gold border shown.
Then put some Foam Pads on each letter and place them on the Brown paper.
Then I attached some images - you could get these off old cards from last year.

I then wrapped a ribbon around it and finally attached the entire piece to a white card and that's it.

Next Post is - 12 days of Christmas - Day 3 - Xmas Decorations.