Monday, February 17, 2014

Vintage Cloche Hat with Highbury Designs on the 15th and 16th Feb 2014.


Introducing a new workshop to ECAC can be a daunting experience. My aim here at ECAC is to find wonderful classes, sometimes a bit wild and wonderful but things that perhaps people would have have heard of. You are taking a big chance that the class will fill. The glory about us here is our classes are small anyway. We never take more then 8 in any class.

So a few months back at the Nicola Brown Wet Felting workshop Nicola mentioned a wonderful girl called Amanda Byrne and I should contact her. So I did. 

Amanda is a darling and we arranged a class that would take place about 4 months later in Feb 2014. 
As usual the time just flew by and the weekend of the 15th and 16th was just upon us. I was super excited to make a hat that I would wear in the winter on a daily basis. I love hats and just adored these designs so couldn't wait to make my own.

Eventually the morning came for the class and Amanda Arrived with all her goodies...
We had a wonderful selection of colours to choose from. I had initially thought I would go for Navy but after trying on the colours I knew I would have to go for Pink. We all had so much fun even doing this part. WE were like a group of women in a changing room together commenting on how you looked in that colour..."Oh no, you have to go for the purple it's perfect on you. It suits your eyes and sure haven't you got purple glasses". You can see us now..

We learnt lots of new terms and phrases as many of the ladies had never made a hat before. Each hat immediately started taking on its own design between choosing the colour felt and the Peter Sham, (which i just learnt was the ribbon).
The class was set up and we were ready to go..
Paper and pencils were at the ready..

Then we were introduced to the star of the show. The vintage hat block. There was many hat blocks to choose from but we all seemed to focus in on a few of same ones which worked out fine..

Amanda was a wonderful tutor. So forth coming with her information and also very patient.
Let the fun begin...

Having some fun with the Felt...
After the first day we had to leave the hats to dry until the following day.
Imelda one of the ladies attending the class doing some hand stitching in the conservatory.
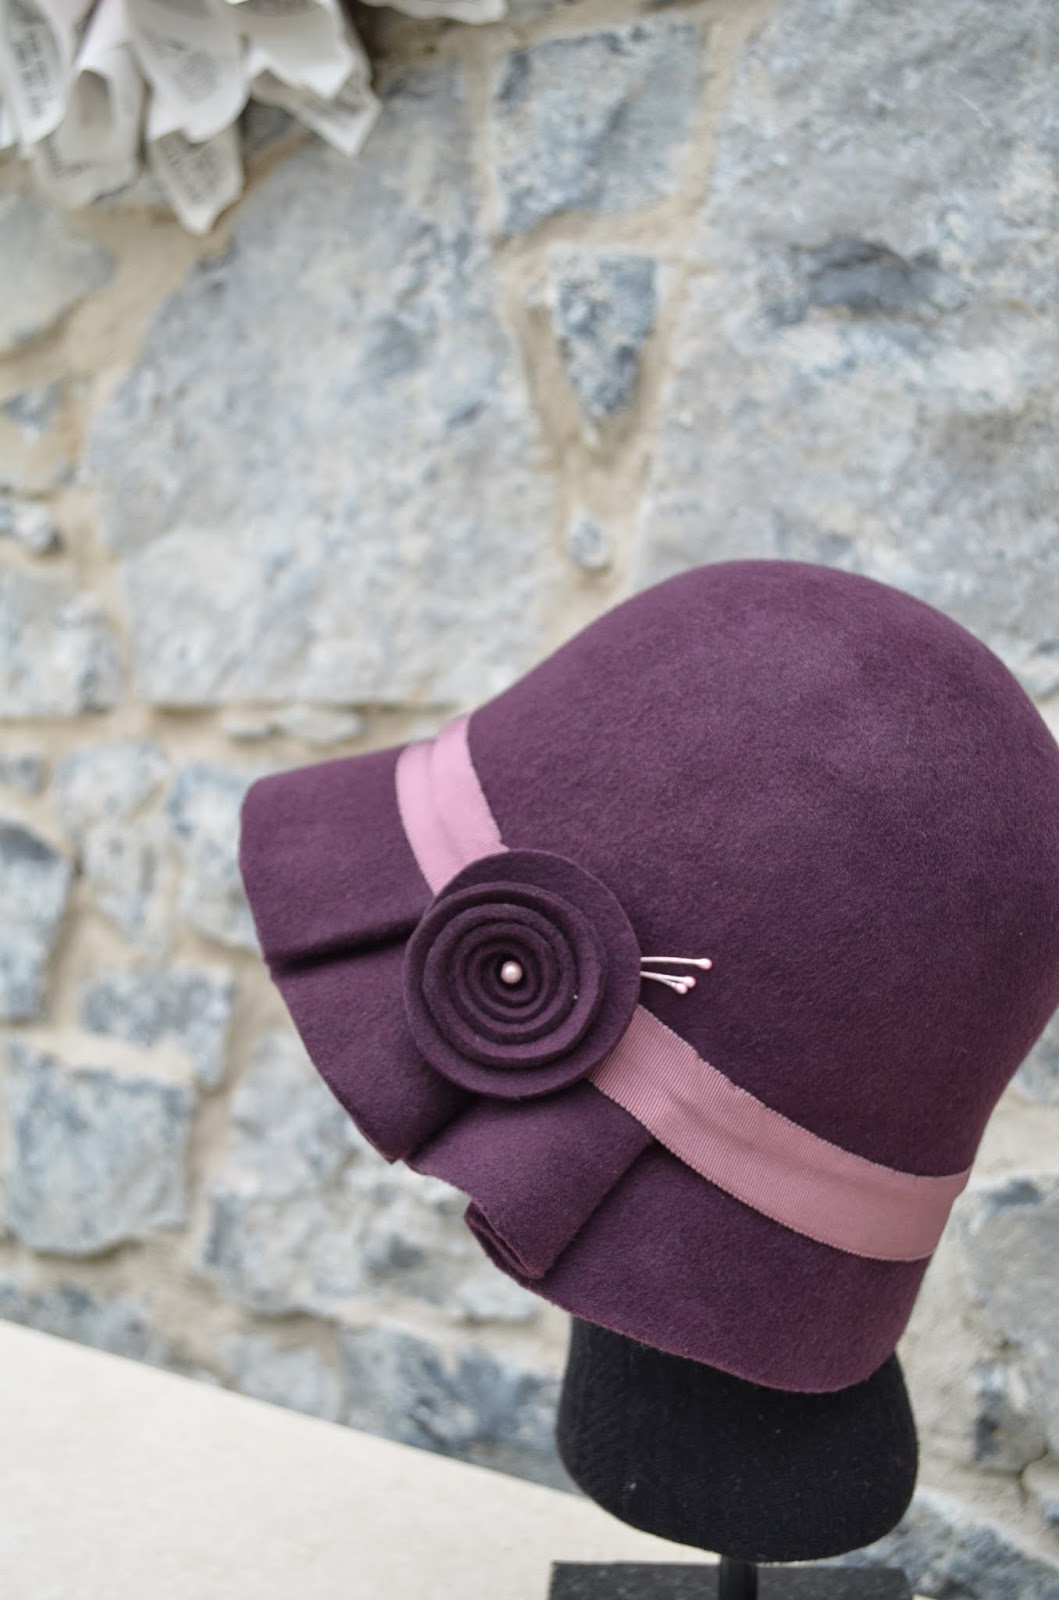
I just love this hat made by one of the students. Each of our personalities shone through the hat we had just created.
With my own hat I had of course to add a piece of crochet.
The flower embellishment I had made a few months previous at the Wet felting workshop with Nicola Brown.


 Love this hat on Mags. She was so proud of her Hat.
 While at the class Amanda asked us to be a bit creative with the felt and this is what Imelda made. Isn't it wonderful.
 Imelda's hat turned out wonderful. She is looking forward to making another hat at the next workshop.

 I just love Brids hat and the Pink and Red together. Isn't this beautiful on her.
Its a colour that would suit so much.
So that's about it really. We had great fun over the two days. Keep a look out for the next Workshop in Millinery on the 2nd March with Bridget Bailey Tomlin and also a workshop on the 5th April with Lina Stein.

So folks that's it really. If you would like to come along to the next Cloche two day workshop let us know and email us today on sbredindesign@eircom.net.

Love and Laughs. 
Shirley


Thursday, February 13, 2014

Writing Table gets a new lease of Life.

I bought this table about 15 years ago and it has already had many lives. It wasn't the most expensive piece of furniture and the quality wasn't great but I loved it then and I still love it today. I like that it's not a good solid timber - then if I decide to do something wild and wonderful with it. Nobody will mind.

When I first bought it, it was white and at the time here in Ireland we had everything cream so the white was painted over and it became cream. It lived in many places in the house and eventually ended up in my daughters room.

Finally one day I had a look at it and decided - Right enough is enough this table needs some DECOUPAGE LOVE.

So here is what I did.
I started sanding and sanding and sanding. Oh how I hate sanding. I haven't actually come across someone that likes it yet.

Sanding this piece made me want to cry. Seriously it went on forever. Sanding inside all the small sections was next to impossible. I couldn't think of any other way to go about it. I didn't want to go and get it dipped as it would cost me too much and I didn't want to put a paint stripper on it. I suffer terribly with migraines if I use any strong smelling paint or varnish so anything I use here has literally no smell so it's lovely to work with...

I didn't however need to sand the drawers as I was decoupaging them. I choose this Toile de Jouy paper in a pretty blue. I then got a red paint and painted the inside base of of the drawers. I then went and got two knobs from Sonoma in Ennis. They make the piece.

The range of paints we use here are called Autentico paints and they are just a dream to work with. We sell them also so if you think you might take on something like this check out their wonderful colour range. They have 130 colours to choose from. A 1ltr tin will cost you €25 and it lasts forever. With many Chalk based paints they say that you need not sand. Well folks sorry but if you come here to a class - you will have to sand. I insist that students always sand their furniture unless of course it's melamine or something that can't be sanded. If that's the case many of our students may decide to Decoupage the entire piece.

For this writing table I did an undercoat of red (Red Stripe)and 2 top coats of blue (Royal Blue). Then I lightly sanded back the piece so some of the red is exposed. Finally then I put a beautiful quote on the top using a stencil.

I love that the piece looks old and antiqued.
To finish it off I gave it a few coats of a dark wax. To be honest if I was to do it all again I would give it a coat of a clear wax. I wasn't totally happy with the dark wax.

So that's it really. It now has a home in my crochet room.

Let us know how you get on or why not join us for one of the next Decoupage or painting classes.


Love and Laughs.

Shirley
ECAC


Wednesday, February 12, 2014

Paper roses wreath.

Paper Roses Wreath is a really lovely project that you would love to do and make. the great things about making one of these is the roses can be made over time and in front of the TV or maybe you might have a few small helpers and they will love making these roses.

What you will need...
1. Pretty paper or even paper from some old books.
2. A polystyrene wreath.
3. Ribbon.
4. Hot glue gun.
5. A cup or something to make a circle shape.
6. A pencil.
7. Scissors.

Check out the post I did on making the paper roses.

Once you have a few roses made you can start attaching them onto the Wreath. You can do this by using your Hot Glue Gun. Before you do so wrap your ribbon around the wreath and glue in place leaving plenty of ribbon free to create a hanging piece.

Once you have the entire wreath covered with roses I then got a separate piece of ribbon and tied this around the other ribbon to create a bow.

And that's it really...

Enjoy. It's great fun.

Love and Laughs.

Shirley


Tuesday, February 11, 2014

Shirley Temple - On The Good Ship Lollipop.avi

My mammy called me after Shirley Temple. Always Loved her. I still think she is adorable.

Daffodil Crochet Wreath

This is a really cute crochet project that I really enjoyed making. I plan on making lots of different styles. Anyone that knows me knows that I really love wreaths and have them all over my house and ones for all different seasons and styles. I use paper, crochet, felting, polymer clay and anything really I can get my hands on. Unfortunately when we think of wreaths here in Ireland we think of sad times but they can also be for happy times, like Christmas, Easter, Halloween and lots of other Holiday times. So take a look and see what you think. I had great fun making it and I hope you enjoy making one too. If you do make one you might let us know on our Blog at Http://enniscreativeartscentre.blogspot.com


What you will need is -

1. A polystyrene wreath.
2. Wool for the wreath.
3. Wool for the Daffodils - You will need two tones of Yellow. A light yellow and a deeper yellow.
4. Wool for the leaves.
5. Hot glue gun.
6. Needle to sew up loose threads.


Crochet pattern.
Trumpet section and the petals are done in different colours and seperately.

Trumpet. Mark each round with a marker so you know where you are. I use a remnant of wool in a different colour.
In a deeper Yellow make 3 chain and join with SS to create a ring.
Round 1: 1ch, 5 dc into ring and do not ss.
Round 2: 2dc into each st to end.
Round 3: 2dc in next stitch, 1 dc, 2 dc to end.
Round 4: Work 3 rounds which are just plain dc. Do not increase or decrease.
Round 8: *3ch and slip stitch into the 1st of the 3 ch. Ss into the next st.* Repeat from  * to * to end.

Main Section with Petals.
In a pale yellow make 3 ch and join with a ss to make a ring.
Round 1: 1ch and 5dc into centre of ring and join with a ss.
Round 2: 1 ch and 2dc into each ch to end. Join with ss.

You have just created the middle and now you are about to create 6 petals.
Petal
Row 1: 1 ch and 3 dc into the same place as you are. 1 ch and turn.
Row 2: 2 dc into the first st, 1 dc, 2 dc into last st. Turn.
Row 3: 2 dc into the first st, 3 dc, 2 dc into last st. Turn.
Row 4 and 5.: Dc to end and turn.
Row 6: dctog, 2dc, dctog, 1dc, turn.

Row 7: dc2tog, 1dc, dctog, turn.
Row 8: dc2tog, 1dc, turn.
Row 9: 2 dc.
And ss down the side of the the petal into the side of the stitches until you get to the centre piece and ss over 2 stitches.

Repeat  5 more times until you have 6 petals.

That's it really and then sew the trumpet part to the main part.
In the middle we need some centre stamens and these are just a few pieces of pale yellow wool . I did this by getting a few pieces of wool and knotting them in the middle and then taking one of the pieces and sewing that part into the trumpet. When doing this part leave the wool long and trim later.

Since making these I have found wonderful Millinery Stamens on the Intenet on Amazon and you get about 1000 of them for just about €14. These work wonderfully with the wreaths. Here is hte link to the Etsy shop.

https://www.etsy.com/ie/listing/100122842/choose-10-colors-1000-double-ended?ref=market i

Leaf.
Ch 15.
Dc into the 2nd ch from hook and dc to end.
4Dc into the last and corner st and then dc up the other side of the piece. (You are now crocheting up the end of the piece to end.).
When you get to end 6 dc into end and corner st.
2 ss, 2 dc, 2 htr, 2 tr, 2dtr, 2tr, 2htr, 2dc, 1ss.
ss around the bottom area and do the same up the other side (2ss, 2dc, 2htr, 2tr,2dtr,2tr,2htr,2dc,1ss).
Ss to the top and finish off.

That's it really.

This is the first time really I have ever written a pattern so please bare with me and if there is any mistakes please let me know. x

For the rest of the wreath you will need to hand wrap wool around the polystyrene and glue it every now and then at the back to make sure it wont fray.

 I used a DK wool here and it looks great but you can use a Chunky wool too.

I am unsure if I will put a ribbon on it just yet?

What do you think. Please post links to some of your projects.

I am happy for you to share this pattern with all your friends or on your blog as long as you show a link back to Ennis Creative Arts Centre. - 

Love and laughs .

Shirley
ECAC


Monday, February 10, 2014

"You're the Apple of My Eye", Valentines Cards.

 These Apple Cards are so sweet to make and all ages enjoy making them. The materials you need to make them you probably have at home. Here I used White Card, Apples, Paint Brush, Black Pen, Red paint (I used Acrylic but Poster paint will do fine). You will then need a blank card to finish it off.

 You need an apple that has a nice heart shape to it. So cut maybe two and see how you go. Try and cut them as straight as you can as you will need them to be straight to stamp them out.
You will get completely different effects from different apples so have some fun with it. I painted the apple with the red paint and then stamped the apple onto the white card. Don't use paper its not hard enough to use on the front of a card.

As you can see I stamped out many of them and this was my favourite. It has a lovely heart shape and you would still know it's an apple.
Then I added some text with my black pen. You can write what ever you want. I wrote "You're the apple of my eye".
Then I picked a backing paper to put behind it on the card but if you don't have this don't worry.

Finally I then stuck it to the blank white card with double sided tape. I just love this effect.
So why not make a few. They could be Wedding cards, Invites, Birthday, Valentines cards and much more. And why not try a few other fruits and veg.....

Let us know how you get on.

Love and Laughs.

Shirley